Creating Custom Menus
This article will show you how to create a custom menu to use on your WordPress site.
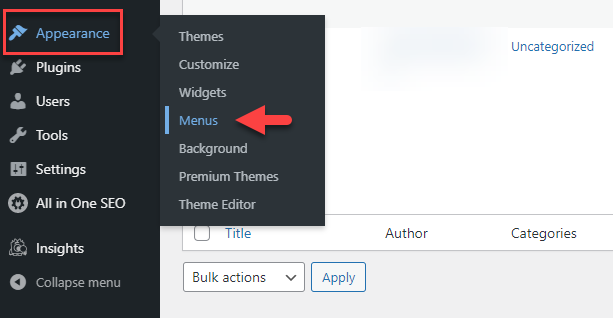
- First, login to your WordPress Dashboard.
- From the left main menu, scroll over Appearance and click Menus.
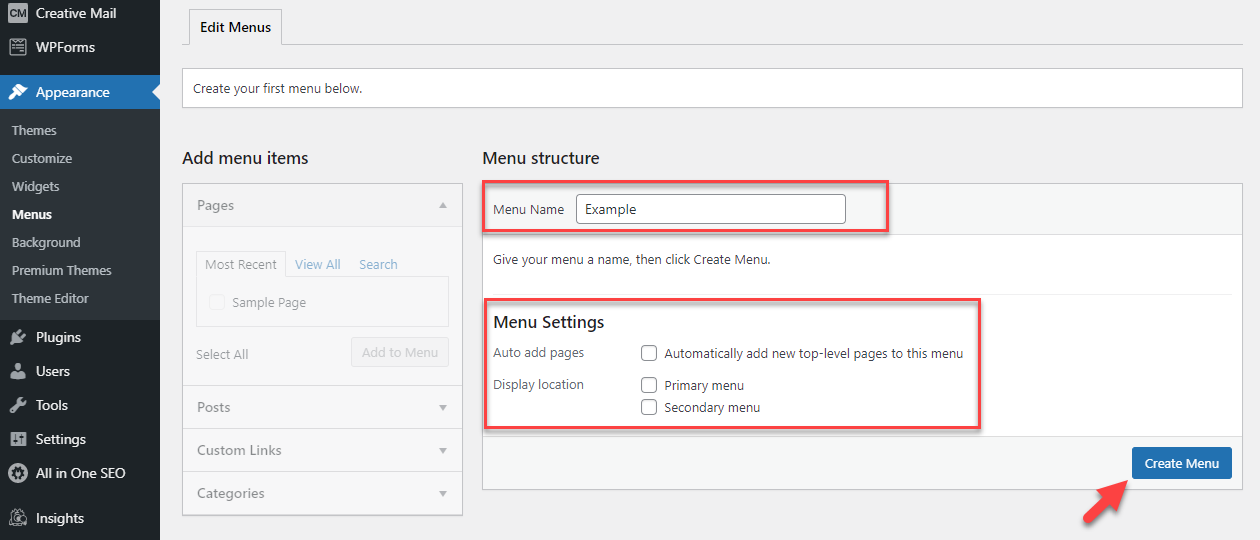
- This will bring you to your Menu page. First, you need to create the menu. Enter a title for your menu and click Create Menu.
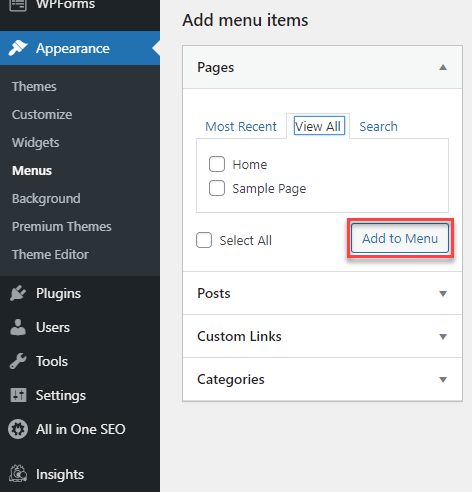
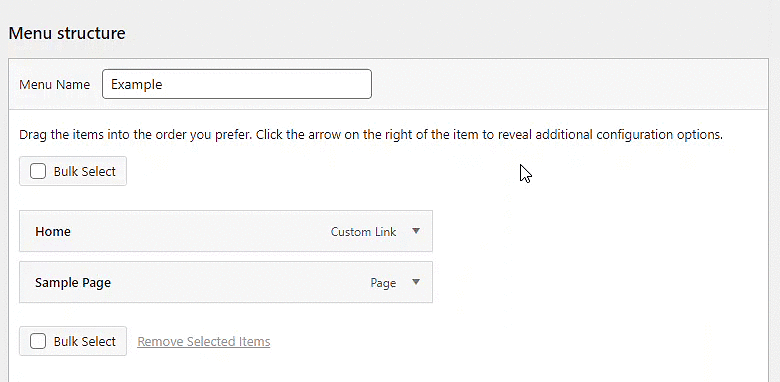
- Now, on the left, select the pages that you want to be shown in the Menu. You can also add links or categories as pages if you would like. Then click Add to Menu.
- Once you have added pages to your menu, you can drag and drop each page to the order you would like them to appear in.
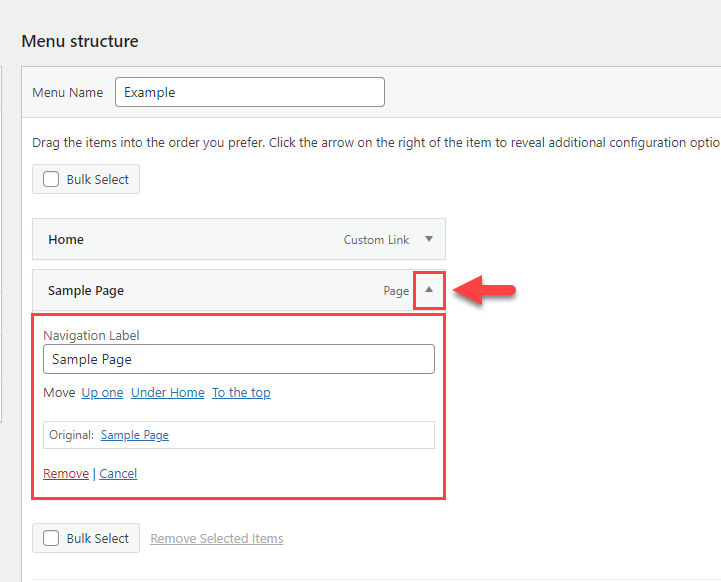
- Also, you can edit the page information by clicking the arrow. You can change the Navigation Label or Remove the page from the menu.
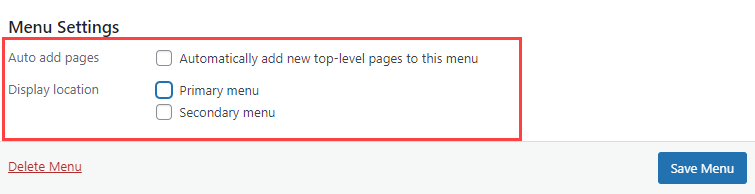
- Different themes may have different locations for the menu. You can select which location in your theme that you would like to use for the menu.
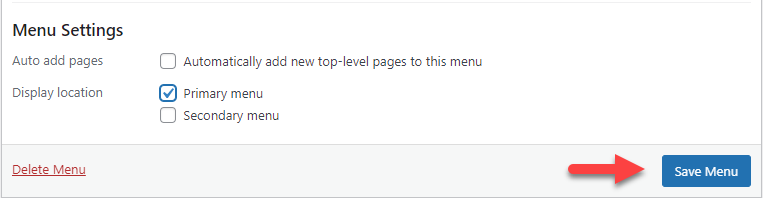
- Once you have created and customized your menu, save your changes by clicking Save Menu.
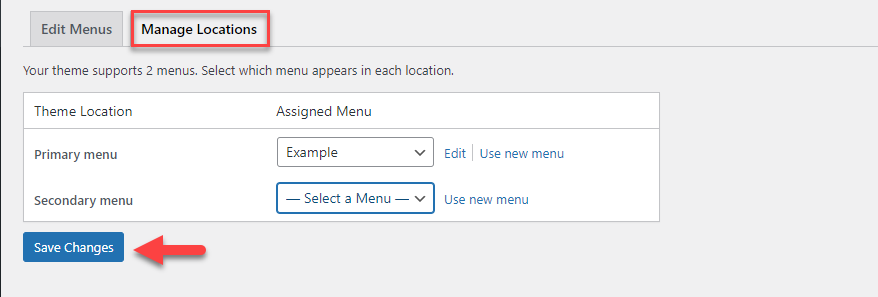
Adding Custom Menus to Pages in WordPress
If the theme you are currently using supports custom menus, you will be able to add your new menu to one of the designated Theme Locations.
- Navigate to Appearance > Menus from your WordPress Dashboard.
- Click on the Manage Locations tab.
- From here you can select which location where you want your custom menu to appear.
- Ensure to click Save Changes, once you're finished.